You are here
Cisco ISE Guest Portal Custom HTML Consideration
Submitted by admin on Sun, 09/22/2013 - 15:42
 If you are currently deploying or planning to deploy Cisco ISE to handle your guest access authentication using Central Web Authentication (CWA), you may not be very fond of the Cisco default login page. Although an ability to replace the Cisco logo and change font and background color are sufficient for some people or organizations, others may find options Cisco provide to customize the portal page on the web GUI rather limiting. Fortunately, Cisco ISE allows you to create a full custom HTML for the login page and several other pages, which gives you complete freedom to make the pages look any way you like. However, greater flexibility come greater responsibility. What this means is ISE will relinquish complete control on all of these pages and it is totally up to you to make them match the flow of the login options, process, and configuration on ISE.

If you are currently deploying or planning to deploy Cisco ISE to handle your guest access authentication using Central Web Authentication (CWA), you may not be very fond of the Cisco default login page. Although an ability to replace the Cisco logo and change font and background color are sufficient for some people or organizations, others may find options Cisco provide to customize the portal page on the web GUI rather limiting. Fortunately, Cisco ISE allows you to create a full custom HTML for the login page and several other pages, which gives you complete freedom to make the pages look any way you like. However, greater flexibility come greater responsibility. What this means is ISE will relinquish complete control on all of these pages and it is totally up to you to make them match the flow of the login options, process, and configuration on ISE.
Here are the pages that ISE allows you to create custom HTML code.
- Login Page
- Acceptable Use Policy (AUP) Page
- Login Success Page
- Error Page
- Device Registration Page
- Change Password Page
- Self-Service Request Page
- Self-Service Result Page
Here is a list of caveats that you would want to take into consideration before creating a custom HTML page for guest portal on your ISE.
Note: This discussion is specific to ISE 1.2 and may or may not be applicable to other versions.
1. Configuration related to portal customization on ISE no longer matters.
As soon as you select the “Custom Default Portal” option when you create a guest portal, that portal will not inherit any settings that you may have configured for customized portal page. This includes things like logo, color scheme, font, and even the language templates. It is now your responsibility to manually includes all those things as part of your HTML codes. This is also true for URL links that show up on the login page as a result of enabling features like Change Password, Self-Service, or Device Registration (see below). These links need to be added or removed manually depending on which features you would like to make available to your users.
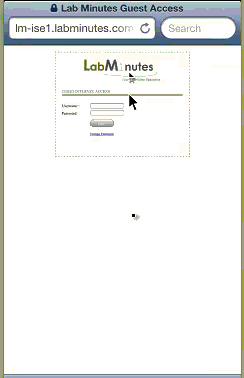
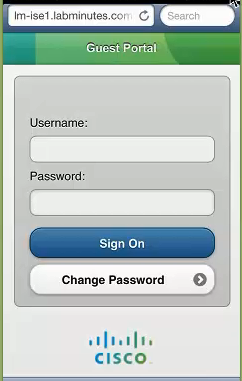
2. You lose capability of having a login page that is fitted to smaller screen size on mobile devices.
If you want the same custom login page to show on mobile devices, assuming the HTML code is built for regular computer, the chances are it will not show in a nice proportion. Unless you can figure out scripts that are able to detect device type and alter HTML code accordingly (if at all possible), your only option is to enable mobile device support on the portal, but you will be back at the Cisco default page, although this only shows on devices that ISE has determined as mobile device.
3. You need to be aware of file locations.
Any non-HTML files (except for the success HTML page. See 4.) will be placed under “portals/<portal_name>/” directory with the <portal_name> being the name of the guest portal created on ISE. What this means is when you reference to those files in the HTML code, you point them to “portals/<portal_name>/<filename>”.
4. You may experience some inconsistency on the reference to the file path.
One we came across is for the success page, where its HTML file seems to be located with the rest of the non-HTML files. Therefore, you have to treat this file differently and use just the “<filename>” instead of “portals/<portal_name>/<filename>” for all file paths within the HTML codes.
5. Self-service and Device Registration Cisco sample codes do not seem to work.
Despite the fact that there are a lot of customization required on these pages such as marking fields as mandatory (if you recall, ISE automatically mark fields that require users to fill in using *), and list of timezone, codes copied straight from the Cisco documentation do not function. This will certainly require more time from you to look into if you run into the same issue. If you have different experience or figure out how to make them work, feel free to share.
6. You cannot mix Cisco default and full custom HTML pages in the same portal configuration.
Once you have chosen the custom portal option, all pages need to be custom. If you are able to get all the pages to work except one, you will either have to give up on the feature, whose page you could not get to work, or resort back to Cisco default portal entirely. Picutre below shows the corresponding HTML files that need to be selected for each feature that is enabled.
For a full step-by-step video on how to create a custom HTML login page, visit the following video pages.
Reference:
About Author
Metha Chiewanichakorn, CCIE#23585 (Ent. Infra, Sec, SP), is a Cisco networking enthusiast with years of experience in the industry. He is currently working as a consulting engineer for a Cisco partner. As a founder of and an instructor at labminutes.com, Metha enjoys learning and challenges himself with new technologies.