You are here
Cisco 4500 4500X 6500 VSS Configuration
Submitted by admin on Sun, 09/22/2013 - 19:06

Virtual Switching System (VSS) is a method to combine two physical switches into one logical switch to achieve physical redundancy, Spanning-Tree blocking elimination, and increased bandwidth. VSS was first available in Cisco 6500 but it has recently been introduced to Cisco 4500 and 4500X. This article provides configuration that will allow you to easily enable VSS on these switches.
Background Information
While a similar technology (Multi-Chassis Etherchannel, MEC) exists in Nexus datacenter switches known as vPC, the Nexus switches only appear to other adjacent switches as one switch across L2 links while maintaining two separate control planes and management points. VSS actually does a better job of emulating a single switch with one active, and one (or more) standby control plane allowing it to fully support a dual-homed L3 routed link. If you are familiar with Cisco Stackwise technology in 3750/3850 switches, VSS is probably more comparable to those except VSS only supports up to two switches and instead of using Stackwise cables, it uses multiple 10G links for interconnecting switches (ie. VSL).
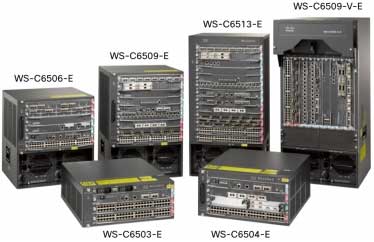
VSS on Cisco 6500
Requirements
- Virtual Switching Supervisor 720-10GE (VS-S720-10GE-3C and VS-S720-10GE-3CXL) with IOS 12.2(33)SXH1 and IP Base
- or Supervisor 2T (VS-S2T-10G and VS-S2T-10G-XL) with IOS 12.2(50) SY and IP Base
Note: Please check Cisco documentation for more detail
Cabling Between Chassis
- Minimum of two 10Gbps links with at least one on the Supervisor
- Minimum of one (more is recommended) 1Gbps or 10Gbps links for dual-active detection
Dual Active Detection Method
There are three available options; BFD, Fast Hello, Enhanced PAgP. EPAgP requires a downstream switch that is EPAgP-capable, which is sometime hard to find. BFD requires an IP address to be configured on the interface. Here we choose to use Fast Hello, although more than one method can be configured.
Configuration Steps:
Make sure all cabling between two switches are completed before proceeding
On Switch 1
1. Set switch number to 1
|
!
switch set switch_num 1 local
switch read switch_num local ! confirm 1 is returned
!
|
2. Configure virtual domain then save config
|
!
configure terminal
switch virtual domain 1
switch 1
mac-address use-virtual ! optional but recommended
!
do wr mem
!
|
3. Configure VSL links.
|
!
interface Port-channel 1
desc --- To Switch 2 VSL ---
switchport
switch virtual link 1
no shut
!
interface range TenGigabitEthernetx/x-y ! modify as necessary
channel-group 1 mode on
no shutdown
!
do wr mem
exit
!
|
4. Convert switch to VSS mode. Confirm and switch will reload
|
!
switch convert mode virtual
!
|
On Switch 2
1. Set switch number to 2
|
!
switch set switch_num 2 local
switch read switch_num local ! confirm 2 is returned
!
|
2. Configure virtual domain then save config
|
!
configure terminal
switch virtual domain 1
switch 2
mac-address use-virtual ! optional but recommended
!
do wr mem
!
|
3. Configure VSL links.
|
!
interface Port-channel 2 ! must be different number from switch 1
desc --- To Switch 1 VSL ---
switchport
switch virtual link 2
no shut
!
interface range TenGigabitEthernetx/x-y ! modify as necessary
channel-group 2 mode on
no shutdown
!
do wr mem
exit
!
|
4. Convert switch to VSS mode. Confirm and switch will reload
|
!
switch convert mode virtual
!
|
- Wait until switch 2 comes back and join VSS
- You can only make config changes on the active supervisor now
On the active switch
1. Adjust switch priority
|
!
configure terminal
switch virtual domain 1
switch 1 priority 110
switch 2 priority 100
!
|
2. Configure dual-active detection
|
!
switch virtual domain 1
dual-active detection fast-hello
!
interface ra GigabitEthernet1/x/x ! modify as necessary
desc --- VSL Fast Hello ---
dual-active fast-hello
no shutdown
!
interface ra GigabitEthernet2/x/x ! modify as necessary
desc --- VSL Fast Hello ---
dual-active fast-hello
no shutdown
exit
!
show switch virtual dual-active fast-hello ! verify
!
|
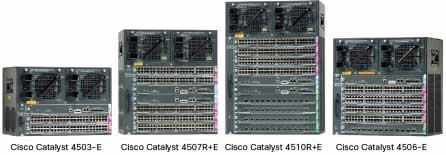
VSS on Cisco 4500/4500X
Requirements
- Supervisor Engine 7-E (WS-X45-Sup7-E) (IP Base)
- Or Supervisor Engine 7L-E (WS-X45-Sup7L-E) (Enterprise Services)
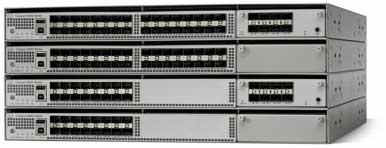
- Or 4500X Switch Family (IP Base)
- Minimum IOS XE 3.4.xSG
- IOS XE 3.5.0E for L3 MEC and Fast Hello Dual-Active Detection support (Recommended)
Note: Please check Cisco documentation for more detail
Cabling Between Chassis
- Minimum of two 10Gbps links with at least one on the Supervisor (4500 Only)
-
Minimum of one (more is recommended) 1Gbps or 10Gbps links for dual-active detection
Dual Active Detection Method
Only Enhanced PAgP used to be supported but, as of 3.5.0E, Fast Hello is made available. EPAgP requires a downstream switch that is EPAgP-capable, which is sometime hard to find. Here we choose to use Fast Hello, although more than one method can be configured.
Configuration Steps:
Make sure all cabling between two switches are completed before proceeding
On Switch 1
1. Configure virtual domain then save config
|
!
configure terminal
switch virtual domain 1
switch 1
mac-address use-virtual ! optional but recommended
!
do wr mem
!
|
2. Configure VSL links.
|
!
interface Port-channel 1
desc --- To Switch 2 VSL ---
switchport
switch virtual link 1
no shut
!
interface range TenGigabitEthernetx/x-y ! modify as necessary
channel-group 1 mode on
no shutdown
!
do wr mem
exit
|
3. Convert switch to VSS mode. Confirm and switch will reload
|
!
switch convert mode virtual
!
|
On Switch 2
1. Configure virtual domain then save config
|
!
configure terminal
switch virtual domain 1
switch 2
mac-address use-virtual ! optional but recommended
!
do wr mem
!
|
2. Configure VSL links.
|
!
interface Port-channel 2 ! must be different number from switch 1
desc --- To Switch 1 VSL ---
switchport
switch virtual link 2
no shut
!
interface range TenGigabitEthernetx/x-y ! modify as necessary
channel-group 2 mode on
no shutdown
!
do wr mem
exit
!
|
3. Convert switch to VSS mode. Confirm and switch will reload
|
!
switch convert mode virtual
!
|
- Wait until switch 2 comes back and join VSS
- You can only make config changes on the active supervisor/switch now
On the active switch
1. Adjust switch priority
|
!
configure terminal
switch virtual domain 1
switch 1 priority 110
switch 2 priority 100
!
|
2. Configure dual-active detection
|
!
switch virtual domain 1
dual-active detection fast-hello
!
interface ra GigabitEthernet1/x/x ! modify as necessary
desc --- VSL Fast Hello ---
dual-active fast-hello
no shutdown
!
interface ra GigabitEthernet2/x/x ! modify as necessary
desc --- VSL Fast Hello ---
dual-active fast-hello
no shutdown
exit
!
show switch virtual dual-active fast-hello ! verify
!
|
About Author
Metha Chiewanichakorn, CCIE#23585 (Ent. Infra, Sec, SP), is a Cisco networking enthusiast with years of experience in the industry. He is currently working as a consulting engineer for a Cisco partner. As a founder of and an instructor at labminutes.com, Metha enjoys learning and challenges himself with new technologies.
2 comments
6500 series
VSL configuration